Key Points:
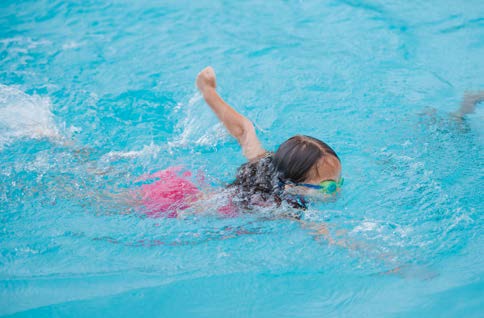
WATER EXPLORATION AND SAFETY
Level Overview
- Jeff Ellis Swimming follows the recommendation of the American Academy of Pediatrics regarding lessons for children under the age of 1. The American Academy of Pediatrics {AAP} does not recommend formal swim programs for children under the age of 1.
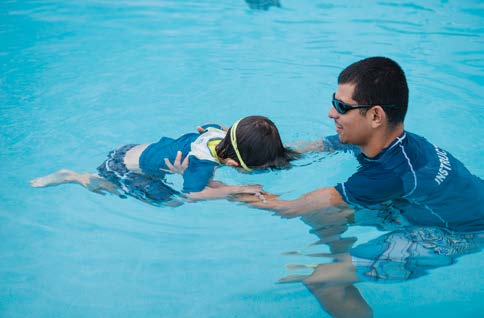
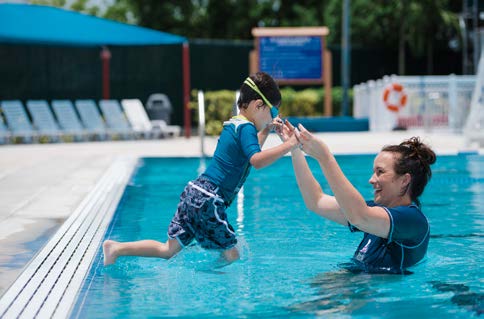
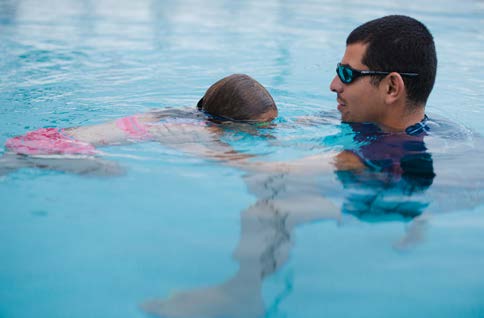
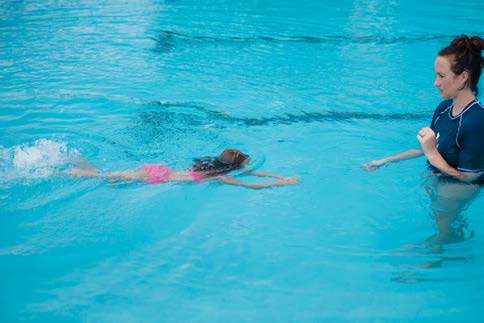
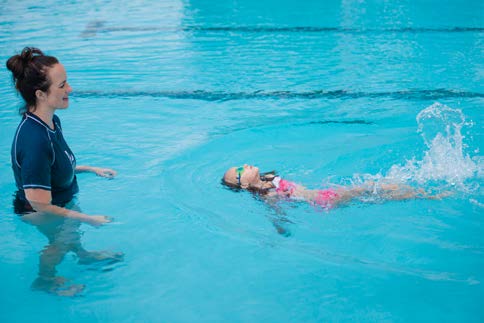
- This level is an introduction to water safety and basic water skills for both parent and child. The Water Exploration and Safety lesson is meant to allow the child to explore the water in a supervised and fun environment with the guidance of the swim instructor and parent.
- A parent or guardian must be in the water with the child.
- The swim instructor will demonstrate the correct technique for assisting and what you want the child to achieve.
- The swim instructor will interact with the parent and the child. Give feedback to both the parent and the child.
- The swim instructor must be prepared to address questions from the parents, and provide toys, songs, and games.
- Repetition is the key to success
- Children at this age find repetition calming and helps them feel more secure and in control.
- Children need the routine to build confidence and feel secure in their environment.
- Every lesson will be very similar which is beneficial in creating this optimal environment.
Water Exploration and Safety Level Skills
Bubbles
Participants should demonstrate blowing bubbles with the support and assistance from parents and/or swim instructor. Start with bubbles on the surface of the water and work toward performing bubbles with the nose and mouth in the water when the student is ready.
Teaching Tips:
- Do not force the student underwater.
- Have the parent hold the child face to face to demonstrate blowing bubbles.
- Use games and songs like "Ring Around the Rosie" or "Motorboat."
Water over the Head
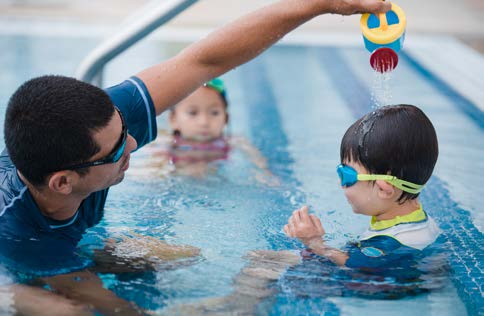
Parents should work on pouring water over the student's head using a watering can or something that lets the water run over participants' heads slowly.
Teaching Tips:
- Start with pouring water over the arms and legs.
- Parents allow children to pour water over their heads and then over their own heads.
- Make sure whatever is being used to pour water over the head does not just dump the water on the student but sprinkles the water over the head.
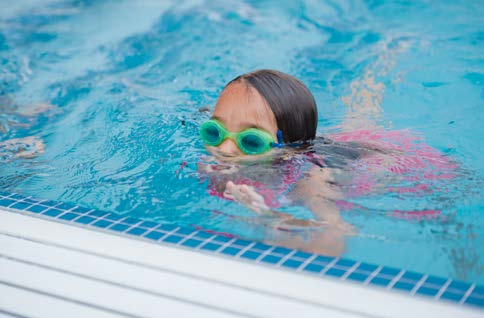
Putting Face in the Water
Participants should work on putting their faces in the water when they are ready. While in the water, parents should encourage participants to blow bubbles.
Teaching Tips:
- Do not force children to put their faces in the water. Wait until they are ready and comfortable.
- Allowing water to slowly run over the head is a good start.
- Try putting one part of the face in the water at a time, such as the chin or a cheek.
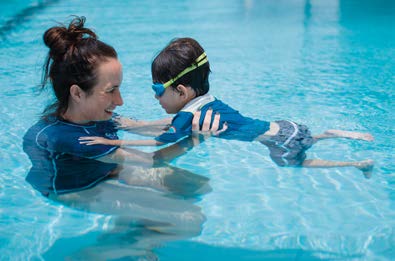
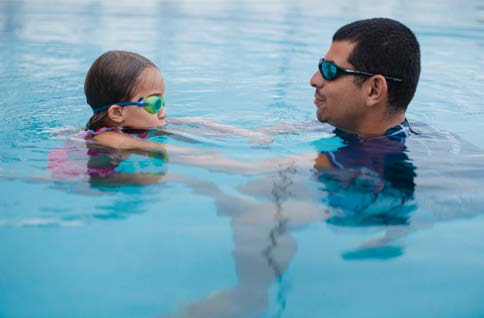
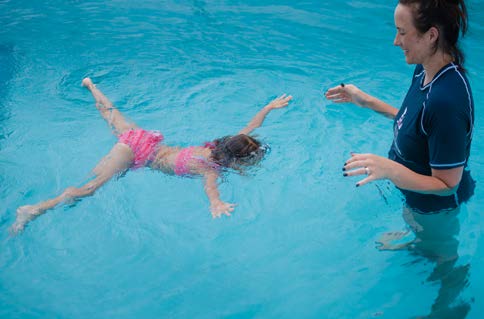
Front Float Position
Parents should assist children in the front float position by either holding under their armpits or having the child hold parents' shoulders while supported at the waist or armpits. Children should be encouraged to blow bubbles and put their faces in the water if they are ready.
Teaching Tips:
- Work with parents to make sure they are properly assisting the children. HOld under the armpits with thumbs on the chest. Tilt so the chin is in the water and feet are out behind. Give a cue to start blowing bubbles like "1, 2, 3." Parents should be blowing bubbles while they are face to face to demonstrate.
- If they are not ready for bubbles or putting their faces in the water, have them just put their chins in the water.
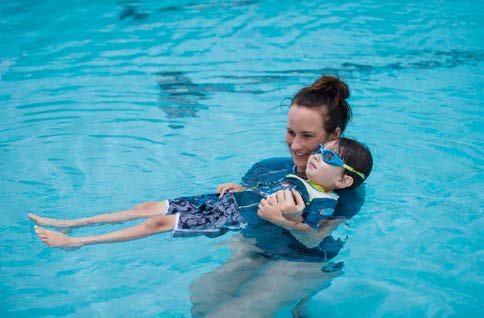
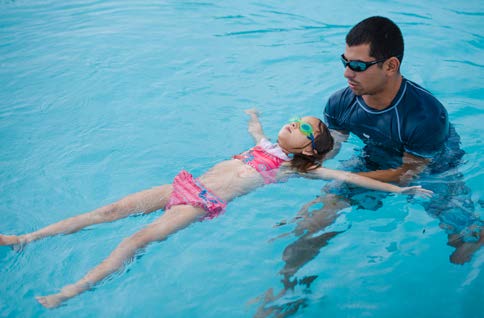
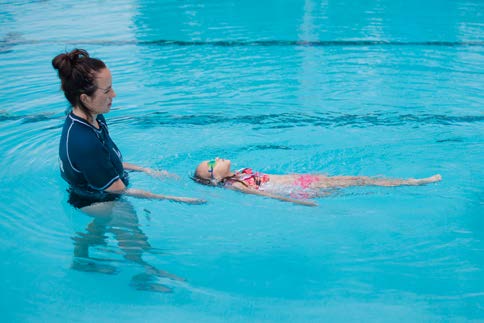
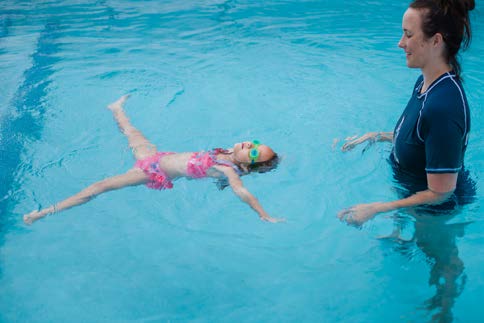
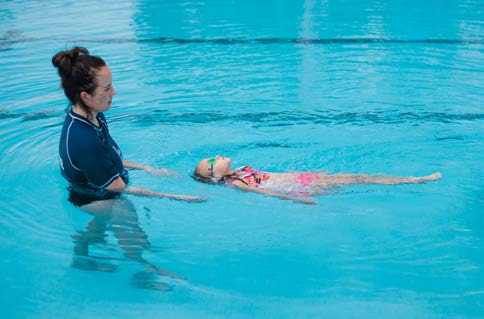
Back Float Position
The parent should assist the child in the back float position. Child places head on parent's shoulder or parent supports child behind the neck and back; it will depend on how comfortable the child is.
Teaching Tips:
- Work with parents to make sure they are properly assisting children. Go over the different levels of support with the parents.
- It is important that parents do not move through the different levels of support until the children are comfortable and able to relax, staying in that position for a few seconds. If a parent moves to a different position and the child is not comfortable or willing to go into the back float position, return to the previous support position.
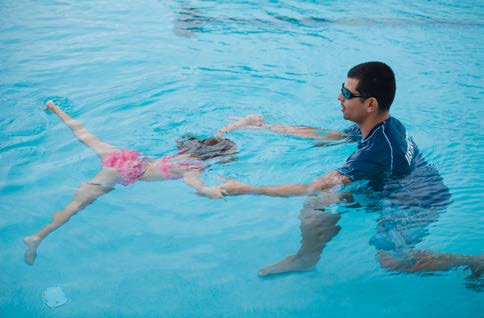
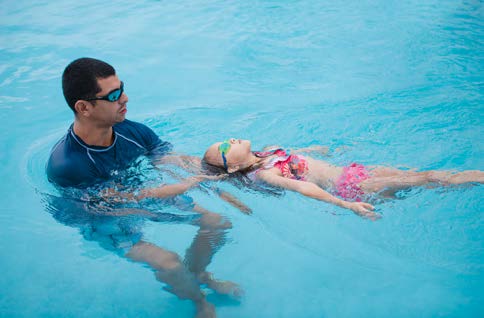
Flipping Front to Back and Back to Front
The parent should assist the child in going from the front float position to the back float position and then back to the front float position. The parent can assist the child by using the under-the-armpit assist position for the front float and then turning the child on to the back. Depending on the child, the parent might need to place the child's head on the shoulder; the parent can then flip the child back on to the stomach and help to the side of the pool.
Teaching Tips:
- Work with parents to make sure they are able to assist correctly moving into the different positions.
- The song "I'm a Little Pancake" is good to use for this activity.
- When parents help the children to the side of the pool after flipping back over, parents should encourage children to grab the side of the pool on their own and work on exiting the pool.
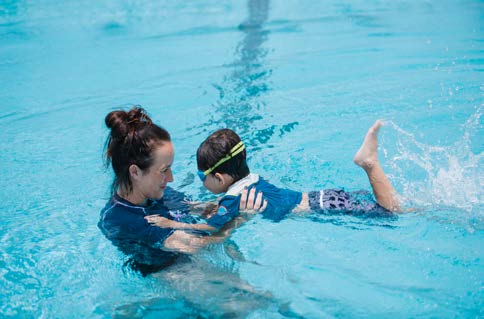
Kicking Movement
Parents should assist children while kicking in the front float and back float positions. Parents might have to move children's legs in the kicking motion at first.
Teaching Tips:
- When in the front float position, children can hold on to parents' shoulders while parents move the children's legs in the kicking motion. For the back float position, parents can do the same thing while the children's heads are on their shoulders.
- "Motorboat" is a good song to practice their kicking.
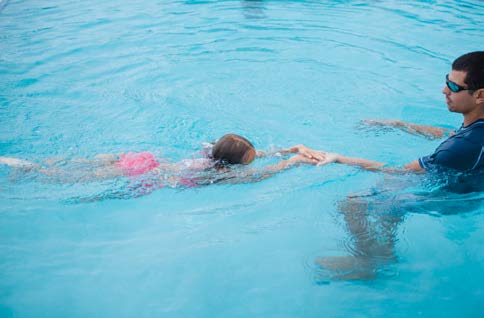
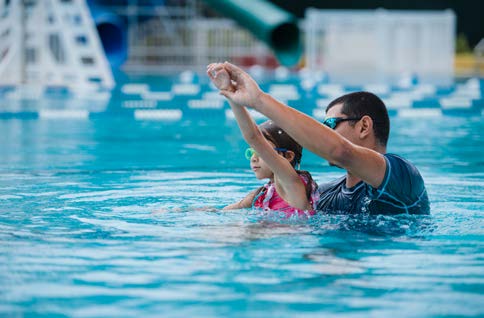
Arm Movement
Parents should assist children with the arm movement while in the front float position if possible. If a child is not ready to add the arm movement to the front float position then the parent can assist the child while seated on the stairs, walking in the water, or on the side of the pool.
Teaching Tips:
- If a child is ready to add the arm movement to the front float position, the parent can support at the waist while the child moves the arms. Use fun terms for the arm movement like ice cream scoops or diggers. You can use a toy for the child to do the arm movement toward and then grab the toy.
- If a child is not ready to add the arms to the front float position then start by sitting on the stairs on side of the pool while the parent moves the arms. If there is an area the child can walk in {waist- to chest-deep water), walk while moving the arms. The parent can use a toy for the child to walk toward, moving the arms to get.
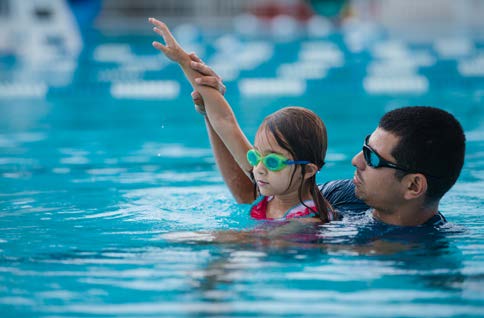
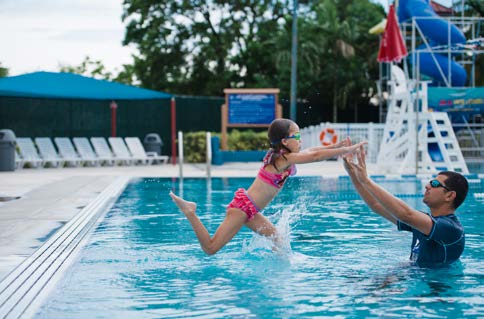
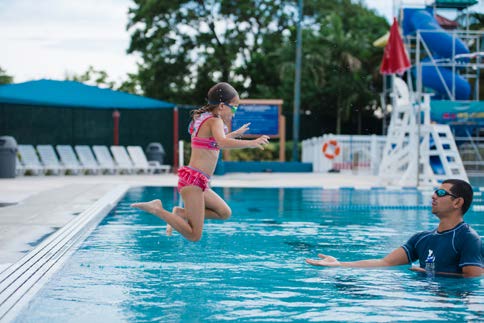
Assisted Jumping into the Pool
Parents should assist the children if they are ready to jump into the pool. Children should not be forced to jump in and should only do this when ready.
Teaching Tips:
- Make sure the parent is giving a cue before the child jumps in, and it is the same cue each time. Examples of cues are counting down, saying "Ready, set, go," or having the child ask permission before jumping.
- The parent can start by lifting the child in to the water from under the armpits if the child is not quite ready to jump in. If the child is comfortable with that, then the parent can hold both hands while the child jumps in. The parent should make sure that the child blows bubbles when jumping in if the head goes under water.
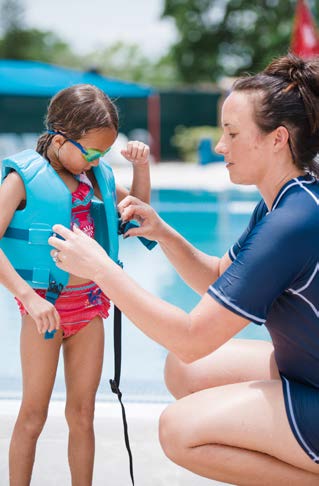
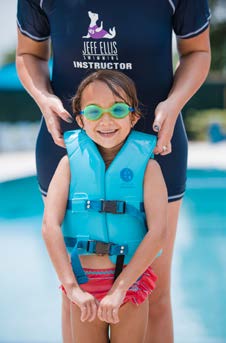
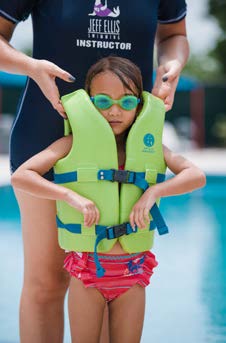
Lifejackets
The swim instructor should work with the parents to go over the correct fit of the lifejacket for each child. Parents can assist the children in the water while they are wearing the lifejackets. Allow children to explore the pool while wearing the lifejackets.
Teaching Tips:
- The lifejacket should be snug but comfortable. All clips or buckles should be fastened leaving no loose straps. To see if the lifejacket fits the child, have the parent pull up on the shoulders of the lifejacket. The lifejacket should not go above the chin and ears.
- If the children are comfortable, allow them to jump into the water wearing the lifejacket. If they are not comfortable jumping, then have them get in to the water from the steps or side with assistance from the parents. While in the water, children can go in to the front float and back float positions and try kicking. Make sure parents stay close to their children and are assisting in exploration.
Water Safety
The swim instructor should go over safety rules with the parents and children about not only pool rules but also water safety at home. The instructor should include safety for all bodies of water, including their own pools, lakes, oceans, and even bathtubs.
Teaching Tips:
- Go over the WATERSMART rules with the parents and children. Each facility will also have its own specific rules, so go over those rules as well. The swim instructor can do a safety rule a day or your facility might choose to have a specific safety day. It is always important to reinforce safety rules in every lesson. Remember repetition is key.
- The swim instructor should also go over water safety at home which could be personal pools, bathtubs, lakes, oceans, any other bodies of water, or boating.
PRESCHOOL LEVEL
Level Overview
- In preschool there is an option to teach the lesson with or without a parent. The skills remain the same if the parent is in the water or not.
- The program coordinator has the ability to decide which type of preschool class the individual facility will conduct.
- Using parents in the preschool class:
- When teaching the preschool with parent in class, swim instructors need to involve the parents in the class.
- The parent is there to assist with the swim lessons so swim instructors need to use them.
- The swim instructor should demonstrate for the parents how to hold the child while doing the different skills.
- Demonstrate for everyone with one child and then go around and give feedback to all the parents and participants while they practice the skill.
- The swim instructor should be in the water at all times with the preschool class if parents are present or not.
- This level is perfect for using songs and games to get the participants to participate, learn, and practice skills.
- Even though the parents are in the class, the swim instructor needs to keep control of the lesson and take charge of what is going on.
- The lesson should still be very organized and not turn into a free-for-all where all attendees are doing their own thing.
Preschool Level Skills
Submerge Face
The student must demonstrate the ability to comfortably submerge the face beneath the water's surface for at least five seconds with the support and assistance of either the swim instructor or parent.
Teaching Tips:
- Never force the children to submerge their faces.
- Use fun activities/games to introduce the skill.
- Position yourself in front of the participants to assist with the skill.
- Make sure the participants are blowing bubbles when going under water.
Bobbing
The student must demonstrate the ability to simultaneously blow bubbles from the nose and mouth while bobbing up and down in the water. The student should be completely submerged underwater when blowing from the nose and mouth. The swim instructor or parent should provide support and assistance.
Teaching Tips:
- Bobbing should be done while participants are holding on to the wall.
- Start out slow with two or three bobs in a row.
- Make sure the student is blowing bubbles when going under water.
- If participants are having problems blowing bubbles from their noses have them hum underwater. This will cause air to come from the nose.
Front Float
The student must demonstrate the ability to comfortably perform a front float in chest deep or deeper water for at least five seconds with the support and assistance of either the instructor or parent.
Teaching Tips:
- Body position is very important for this skill. The body should be in a horizontal position.
- To assist with this you should be in front of the child holding the child's hands out straight or hold child under the armpits with their arms out and legs out.
- Put rings or other toys on the bottom of the pool for the participants to look at while they are floating. This will help them focus on looking down, which will help their body position.
Back Float
The student must demonstrate the ability to comfortably perform a back float in chest-deep or deeper water for at least five seconds with the support and assistance from the parent.
Teaching Tips:
- Body position is very important for this skill. The body should be in a horizontal position.
- To assist with this skill you should be behind the student and hold from under the head or neck. Never stand to the side of the student to assist.
- Make sure heads are back and participants are looking at the sky/ceiling.
- Have participants sing a song while on their backs to make them relax and think about something else. "Twinkle Twinkle Little Star," "Row Your Boat," and the "ABC Song" are all good ones for this age.
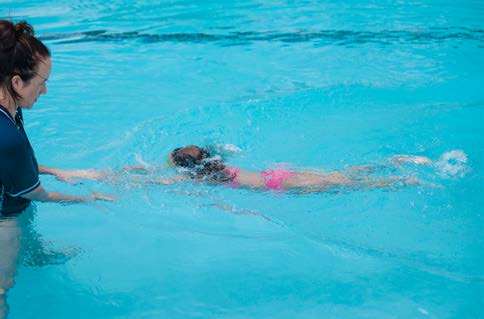
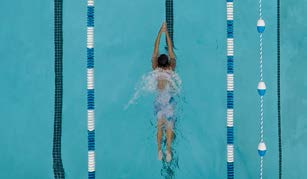
Front Crawl Arms
Participants must demonstrate the ability to perform a front crawl arm stroke to efficiently propel their bodies through the water for a distance of 10 feet without support or assistance.
Teaching Tips:
- Front crawl arms can be explored while doing a water walk or practiced sitting on the side. A water walk is when the participants are in chest-deep water walking while moving their arms in the front crawl motion.
- Use words like puppy paws or ice cream scoops to describe the arms.
- To assist with this skill you can place a hand on either side of the student's waist.
- Try to have the participants put their faces in the water or blow bubbles to help maintain the correct body position.
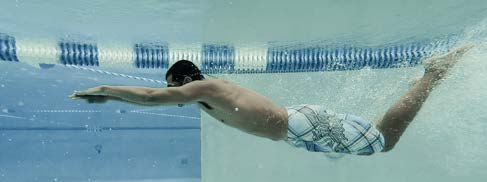
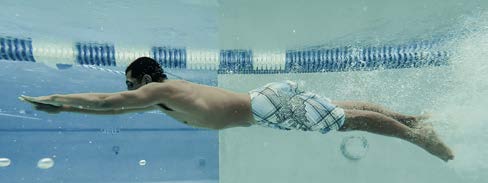
Front Glide
The student must demonstrate the ability to comfortably perform a front glide in chest-deep or deeper water for a distance of five feet without support or assistance.
Teaching Tips:
- Have the student start from the wall to push off into the glide.
- To assist with this skill hold on to the student's hand while student pushes from the wall. Make sure to stay in front.
- Participants need to have their faces in the water to maintain correct body position.
- Describe the glide as a torpedo, rocket ship, or superman to help the participants understand the concept.
Back Glide
The student must demonstrate the ability to comfortably perform a back glide in chest deep or deeper water for a distance of five feet without support or assistance.
Teaching Tips:
- Have participants start by facing the wall and pushing off into the glide.
- To assist, place your hand under the head or neck of the student while at the wall about to push off.
- Make sure the body position is correct for the glide.
- When the participants are on the wall tell them to get in a frog position and then jump (push) off the wall into the glide position. Make sure the participants are starting with their heads lying back in the water.
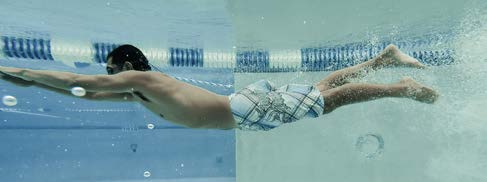
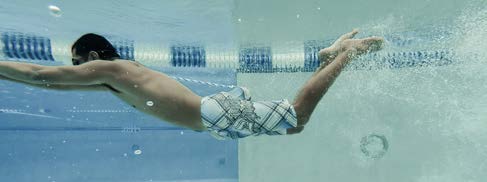
Front Glide with Kick
The student must demonstrate the ability to comfortably perform a front glide with flutter kick in chest-deep or deeper water for a distance of 10 feet without support or assistance.
Teaching Tips:
- Student should start the front glide and then add the flutter kick.
- To assist stay out in front of the student and hold on to student's hands.
- Make sure the student is using the whole leg when kicking and not just making huge splashes.
Back Glide with Kick
The student must demonstrate the ability to comfortably perform a back glide with flutter kick in chest-deep or deeper water for a distance of 10 feet without support or assistance.
Teaching Tips:
- Participants should start the back glide and then add the flutter kick.
- To assist stay behind the student with a hand on the neck or back of the head.
- When kicking make sure the student's legs and knees are not coming all the way out of the water. This looks similar to riding a bicycle.
- Have them point the toes like a ballerina or like preparing to kick a soccer ball to help them have the correct kicking form.
Front Crawl
The student must demonstrate the ability to comfortably perform the combined front crawl in chest-deep or deeper water for a distance of 20 feet.
Teaching Tips:
- Participants should start from the wall with a glide and then add the arms and legs.
- Make sure to stay within arm's reach when they are practicing this skill.
- To assist with this skill you can place a hand on either side of the student's waist.
- Make sure the participants have the correct body position; they are putting their faces in the water and blowing bubbles.
Elementary Backstroke
The student must demonstrate the ability to confidently perform the elementary backstroke for a distance of 20 feet.
Teaching Tips:
- Have participants start out of the water to practice the arm and leg movements for the stroke.
- Need to start in a glide position from the wall. Legs should be straight and together. Arms should be straight down by the side.
- To assist hold the back of the head or neck.
- Describe the stroke as monkey-airplane- soldier or chicken-airplane-soldier. Have the kids say this while they are doing the stroke. Monkey and chicken describe the movement of the hands up the sides to the armpit and the legs being bent at the knees. Airplane describes the second movement of the arms when they are straight out away from the body and the legs go out in opposite directions. Soldier describes the arms when they are down by the side of the body and the legs come back together to finish the kick and propel the student through the water.
Jumping into the Water
The student must demonstrate the ability to confidently without hesitation jump into chest-deep or deeper water with the support and assistance of either the instructor or parent.
Teaching Tips:
- Give the student a cue before jumping into the water. For example, student must ask permission or the swim instructor says 1,2,3, Jump.
- Jumping can be done as the initial activity to get into the water or as a last activity before class is over.
- Make sure the participants understand they need to jump straight out away from the wall and feet first.
- Use a target such as a hoop for them to jump into to help with understanding how they should jump.
- Have all students line up in a single file line when jumping into the water.
Safety Swim
The student must demonstrate the ability to comfortably perform a safety swim by jumping into chest- deep or deeper water and using a combination of the front crawl and elementary backstroke for a distance of 25 yards
Teaching Tips:
- Make sure to stay within arm's reach at all times.
- Have the participants jump in and swim their front crawl and then turn over on their backs to swim their elementary backstroke.
BEGINNER LEVEL
Level Overview
- This level has similar skills to the preschool level but pushes the participants to do more on their own and unassisted.
- The instructor position in this level is in the water within arm's reach of all participants.
- During demonstrations for this level all participants should be positioned on deck where they can see what is being demonstrated.
Beginner Level Skills
Submerge Face
The student must demonstrate the ability to comfortably submerge face beneath the water's surface for a period of at least ten seconds.
Teaching Tips:
- This skill can be done by having the student jump into the water and stay under for a few seconds.
- Participants can also do this skill while going underwater to retrieve a toy.
Bobbing
The student must demonstrate the ability to simultaneously blow bubbles from the nose and mouth while bobbing up and down (underwater) in chest-deep or deeper water.
Teaching Tips:
- Bobbing can be done as a warm up drill while holding on to the side of the pool.
- Make sure the participants are blowing the air out each time they go under water. This skill will transfer to rhythmic breathing later on.
Front Float
The student must demonstrate the ability to confidently perform a front float for 10 seconds under the close supervision of the swim instructor.
Teaching Tips:
- Body position is very important for this skill. The body should be in a horizontal position.
- Put rings or other toys on the bottom of the pool for the participants to look at while they are floating. This will help them focus on looking down, which will help their body position.
Front Glide
The student must demonstrate the ability to confidently perform a front glide for a distance of 10 feet under the supervision of the swim instructor.
Teaching Tips:
- Have the student start from the wall to push off into the glide with the face in the water and arms out in front of the body to maintain correct streamlined body position.
- To assist with this skill hold on to one hand while the student pushes from the wall and places the other hand on top of the first one. The swim instructor can sandwich the student's hands while pulling from the wall.
- Describe the glide as a torpedo, rocket ship, or superman to help them understand the concept.
Back Float
The student must demonstrate the ability to confidently perform a back float for 10 seconds under close supervision of the swim instructor.
Teaching Tips:
- Body position is very important for this skill. The body should be in a horizontal position.
- To assist with this skill you should be behind the student and hold under the head or neck. Never stand to the side of the student to assist.
- Make sure heads are back and participants are looking at the sky or ceiling.
- Have them sing a song while on their backs to make them relax and think about something else. "Twinkle, Twinkle Little Star," "Row Your Boat," and the "ABC Song" are good ones for the younger participants.
Back Glide
The student must demonstrate the ability to confidently perform a back glide for a distance of 10 feet under close supervision of the swim instructor.
Teaching Tips:
- Have participants start by facing the wall and pushing off into the glide.
- When at the wall tell participants to get in a frog position and then jump off the wall into the glide position.
- Make sure participants have good body position in the glide.
Front Glide with Kick
The student must demonstrate the ability to confidently perform a front glide with flutter kick for a distance of 20 feet under close supervision of the swim instructor.
Teaching Tips:
- Participants should start the front glide and then add the flutter kick.
- Make sure the student is using the whole leg when kicking and not just making huge splashes with bent knees.
- Kickboards can be useful for practicing the flutter kick.
Back Glide with Kick
The student must demonstrate the ability to confidently perform a back glide with flutter kick for a distance of 20 feet under close supervision of the swim instructor.
Teaching Tips:
- Participants should start the back glide and then add the flutter kick.
- When kicking make sure their legs or knees are not coming all the way out of the water.
- Have them point their toes like a ballerina or like their toes are playing peek a boo.
- Kickboards can be useful to practice kicking while on their backs.
Front Crawl Arms
The student must demonstrate the ability to confidently perform a front crawl arm stroke with face in the water. The student may breathe when necessary, but the face should otherwise remain in the water.
Teaching Tips:
- Participants should be extending their arms out of the water and getting their elbows out of the water.
- Barbells can be used to practice getting the arms all the way out of the water with the elbow high. To assist with the barbell stand out in front and hold the outside edges.
- The student's face should be in the water blowing air out while the face is submerged.
Elementary Backstroke
The student must demonstrate the ability to confidently perform the elementary backstroke for a distance of 25 yards.
Teaching Tips:
- Participants should push off from the side of the pool to start the stroke.
- Make sure they have correct body position for the stroke.
- Use Monkey-Airplane-Soldier or Chicken-Airplane-Soldier to describe the movements of the arms and legs.
- Work on the timing with them to make sure they are including the glide.
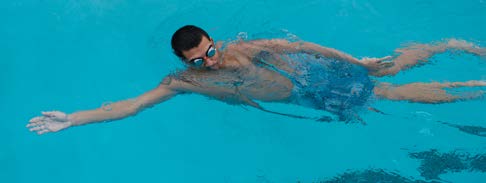
Front Crawl
The student must demonstrate the ability to confidently perform the front crawl for a distance of 25 yards. The student's face should remain submerged except during breathing attempts.
Teaching Tips:
- Remain within arm's reach to provide encouragement and feedback to the student.
- Start out with a shorter distance and work up to the 25 yards.
- Use practice drills to work on stroke proficiency and endurance.
Backstroke
The student must demonstrate the ability to confidently perform the backstroke for a distance of 25 yards.
Teaching Tips:
- Participants should start from the wall with a back glide then add the arms and flutter kick.
- Have participants practice the arm movements while out of the water so you can monitor correct position and understanding.
- Describe the arm movement: The thumb comes out of the water, the hand turns so the palm faces out, and the pinky enters the water first to finish the stroke.
- Demonstrate the stroke for them and ask questions about the stroke.
Jumping
The student must demonstrate the ability to confidently jump into chest-deep or deeper water under the close supervision of the swim instructor and swim back to the side of the pool.
Teaching Tips:
- Make sure the participants jump straight out away from the side and feet first.
- After jumping in have them turn around and swim back to the side of the pool.
Combined Swim Exam
The student must confidently swim the front crawl, backstroke, and elementary backstroke. During the front crawl the head should remain in the water except during attempts to breathe. This should be completed without assistance from the instructor.
Teaching Tip:
- Stay within arm's reach while the participants perform their swim exam.
ADVANCED BEGINNER LEVEL
Level Overview
- In this level the distances increase and new strokes and skills are introduced.
Advanced Beginner Level Skills
Introduction of Breaststroke
The student must demonstrate the ability to confidently perform the arms and kick for the breaststroke. The timing to the stroke does not need to be exact at this point.
Teaching Tips:
- Demonstrate the arms and kick separately and then have the student practice each component.
- Kickboards can be used to work on the breaststroke kick.
- Noodles or pull buoys can be used to work on the breaststroke arms.
Submerge Face
Participants must demonstrate the ability to confidently submerge their faces underwater for a period of at least 15 seconds.
Teaching Tips:
- You can still do jumping activities or have them swim a distance underwater.
- Game ideas for this skill could be retrieving diving sticks or rings.
Bobbing
The student must demonstrate the ability to simultaneously blow bubbles from the nose and mouth while bobbing up and down in the water.
Teaching Tips:
- Increase the number of bobs that the participants are doing with each class.
- Try doing a traveling bob instead of having them on the wall.
- It is very important the participants are blowing their air out while underwater.
Front Float
The student must demonstrate the ability to confidently perform a front float for 10 seconds under the supervision of the swim instructor.
Teaching Tips:
- At this level all participants should be doing a front float without any assistance from the instructor.
Front Glide
The student must demonstrate the ability to confidently perform a front glide for a distance of 15 feet under supervision of the swim instructor.
Teaching Tips:
- Participants should all be able to do their front glide on their own with the correct body position.
- Use a contest to see who can glide the farthest.
Back Float
The student must demonstrate the ability to confidently perform a back float for 10 seconds under the supervision of the swim instructor.
Teaching Tips:
- At this level all participants should be able to do a back float without assistance from the instructor.
- Make sure the student has correct body position of head back, lying flat on the surface of the water.
Back Glide
The student must demonstrate the ability to confidently perform a front glide for a distance of 15 feet under supervision of the swim instructor.
Teaching Tips:
- Participants should all be able to do the back glide on their own with the correct body position. The correct body position is head back in the water and gliding across the top of the water.
- Use a contest to see who can glide the farthest.
Front Glide with Kick
The student must demonstrate the ability to confidently perform a front glide with flutter kick for a distance of 20 feet under supervision of the swim instructor.
Teaching Tips:
- Participants should start with a front glide then add the kick.
- Kicking should use the whole leg and have floppy ankles with limited splashing. Think small fast kicks.
- Faces should be in the water blowing out air while submerged.
Back Glide with Kick
The student must demonstrate the ability to confidently perform a front glide with flutter kick for a distance of 20 feet under supervision of the swim instructor.
Teaching Tips:
- Participants should start with a back glide then add the kick.
- Kicking should use the whole leg and have floppy ankles with limited splashing. Think small fast kicks.
- Heads should be back and participants looking at the sky/ceiling.
Front Crawl with Rhythmic Breathing
The student must demonstrate the ability to confidently perform the front crawl in chest-deep water. The student should use rhythmic breathing while swimming the front crawl for 25 yards.
Teaching Tips:
- Demonstrate the front crawl with rhythmic breathing for the participants. Explain when the head turns to take a breath the arm should be out of the water, and as the arm reenters the water the face should follow. Air should be blown out when the student's face is in the water.
- Work on rhythmic breathing on the side of the pool, with a kickboard or barbell so the participants can work on the timing. Monitor and make corrections immediately.
- Start with shorter distances and work up to the 25 yards with rhythmic breathing.
- Remember to also watch body position, kicking, and arm stroke as well as the breathing.
Elementary Backstroke
The student must demonstrate the ability to confidently perform the elementary backstroke for 50 yards.
Teaching Tips:
- Participants at this level should be able to do the elementary backstroke without assistance.
- Watch body position and make sure they are allowing for the glide in the stroke.
- Work up to the full distance.
Backstroke
The student must demonstrate the ability to confidently perform the backstroke for 50 yards.
Teaching Tips:
- Watch the entry and exit positions of the arms and hands. The hand should exit the water thumb first and reenter the water pinky first. When the arm is out of the water it should be straight and not bend until it is in the water.
- Flutter kick should be used at all times during the stroke.
Breaststroke
The student must demonstrate the ability to confidently perform the breaststroke for 25 yards.
Teaching Tips:
- Practice the kick and the arms separately with a kickboard and/or pull buoy.
- Demonstrate the full stroke and explain the timing to the participants. Start in the glide position then pull, breathe, kick, and glide.
- Timing can be very difficult for the participants to pick up so they will need drills and constant feedback to get it done correctly.
Sidestroke Arms
The student must demonstrate the ability to confidently perform the sidestroke arms for 25 yards.
Teaching Tips:
- Demonstrate the body position for the stroke. The correct body position is lying on your side on the surface of the water.
- Can be described as picking an apple, giving to the other hand, and putting it in the basket.
Scissor Kick
The student must demonstrate the ability to confidently perform the scissor kick for 25 yards.
Teaching Tips:
- Demonstrate the body position of lying on your side in the water and the scissor kick.
- A kickboard can be used to demonstrate the scissor kick. Lie on one side and hold the kickboard with one arm, hold the other arm to the side, and practice the kick.
- Top leg should go forward while the bottom leg goes backward, then they come together to propel you forward.
Jumping
The student must demonstrate the ability to confidently jump into chest-deep or deeper water under the supervision of the instructor and swim to the side of the pool using the front crawl.
Teaching Tips:
- At this level jumping can be used as water entry for other skills.
- Participants can jump in, come up, and swim a stroke for a certain distance.
- Participants need to know how to level off after jumping in.
Combined Swimming Exam
The student must confidently swim 25 yards of the front crawl with rhythmic breathing. The student must swim 25 yards of breaststroke and 50 yards of the backstroke and elementary backstroke.
Teaching Tip:
- Instructor should be in a position to monitor all strokes and participants.
INTERMEDIATE LEVEL
Level Overview
- Again the distance increases in this level and there are introductions of more strokes and skills.
- Students should be able swim independently with no physical help from the instructor.
Intermediate Level Skills
Front Crawl
The student must comfortably perform the front crawl for 50 yards while consistently using rhythmic breathing.
Teaching Tips:
- The instructor should be on deck to monitor body position, arm stroke, kicking, and rhythmic breathing. The participants should be using rhythmic breathing at all times when swimming the front crawl.
- At this level the participants should be working on improving stroke technique and endurance through drills.
Backstroke
The student must comfortably perform the backstroke for 75 yards.
Teaching Tips:
- Instructor should be on deck to monitor body position, arm stroke, and kicking.
- The arm stroke should now have a roll of the shoulders included. Each time the arm reenters the water the shoulder should dip into the water.
- Participants should be working on improving technique and endurance through drills.
Breaststroke
The student must comfortably perform the breaststroke for 50 yards.
Teaching Tips:
- Instructor should be on deck to monitor body position, arm stroke, kicking, and timing.
- Participants should be working on improving technique and endurance.
- Drills should be used to work on technique.
Sidestroke
The student must comfortably perform the sidestroke for 50 yards.
Teaching Tips:
- Instructor should be on deck to monitor body position, arm stroke, and kicking.
- Participants should be working on improving technique and endurance.
- Drills should be used to work on technique.
Elementary Backstroke
The student must comfortably perform the breaststroke for 75 yards.
Teaching Tips:
- Instructor should be on deck to monitor body position, arm stroke, and kicking.
- Participants should be working on improving technique and endurance.
- Drills should be used to work on technique.
Introduction of Dolphin Kick
The student must comfortably perform the dolphin kick for 25 yards.
Teaching Tips:
- Demonstrate the dolphin kick while the participants are positioned on the deck to view the skill.
- Kickboards can be used when performing the kick. Participants can hold on to the kickboard while practicing kicks. Fins can be used to help in learning the kick.
- Having participants dive up and down in the water can help them get the motion for the kick.
Introduction of Butterfly Arms
The student must comfortably perform the butterfly arms.
Teaching Tips:
- Demonstrate the butterfly arms while participants are positioned on the deck.
- Some participants will have some difficulty getting both arms all the way out of the water.
- Practicing out of the water can be useful for the movement of the arms.
Butterfly
The student must comfortably perform the butterfly for 25 yards.
Teaching Tips:
- Demonstrate the butterfly and explain the timing and the breathing for the stroke.
- Be in a position to give verbal feedback immediately.
- Butterfly is a difficult stroke and can take participants some time to master the stroke.
Treading Water
The student should enter deep water and comfortably tread water for two minutes without resting.
Teaching Tips:
- Demonstrate the different kicks that can be done for treading water. Egg beater, breast stroke kick, and scissor kick.
- Build up to the 2 minutes of training by starting with 30 or 45 seconds.
Combined Swimming Exam
The student must swim 50 yards using the front crawl with rhythmic breathing, breaststroke, and sidestroke. The student must swim 75 yards of the backstroke and elementary backstroke and 25 yards of butterfly.
Teaching Tip:
- Instructor should be in a position to monitor all strokes and participants, which is typically from inside of the water.
ADVANCED LEVEL
Level Overview
- This level is about building endurance and working on technical aspects of the strokes.
Advanced Level Skills
Teaching Tips:
- Use drills and practice to build up participants' endurance to swim the required length without resting.
- Instructor should spend most of the time on the deck giving feedback as the participants are swimming.
- Practice drills need to be done to improve the mechanics of the strokes.
- If instructor has been on a swim team or has the skills necessary and knows how to teach a flip turn, they are allowed to do so. Otherwise, flip turns will not be taught.
Front Crawl
The student must comfortably perform the front crawl for 100 yards while consistently using rhythmic breathing.
Backstroke
The student must comfortably perform the backstroke for 100 yards.
Breaststroke
The student must comfortably perform the breaststroke for 100 yards.
Sidestroke
The student must comfortably perform the sidestroke for 100 yards.
Elementary Backstroke
The student must comfortably perform the elementary backstroke for 100 yards.
Butterfly
The student must comfortably perform the butterfly for 50 yards.
Treading Water
The student must jump into deep water and upon returning to the surface comfortably tread water for three minutes.
Teaching Tips:
- Instructor should go over the different kicks for treading water and allow the participants to try all of them.
- The arms should move back and forth close to the surface of the water.
- The head should be upright and not lying back in the water.
- Participants should build up to the full 3 minutes of treading water.
Surface Dive and Underwater Swimming
The student must perform a surface dive in deep water and swim underwater to a depth of 8 feet, locate and retrieve an object, and return it to the surface.
Teaching Tips:
- Demonstrate the skill while the participants watch from the deck.
- Participants should start in the water and do a feet first surface dive to go to the bottom and retrieve an object then return to the surface.
- Participants might need to start in shallower water and work up to the depth of 8 feet.
Combined Swimming Exam
The student must swim 100 yards using the front crawl with rhythmic breathing, backstroke, elementary backstroke, sidestroke, breaststroke, and 50 yards of butterfly.
Teaching Tip:
- Instructor should be in a position to monitor all strokes and participants on deck. The position of the instructor is from a coaching perspective outside of the water..
Adult Swim Lessons
Adult 1: Ages 15+
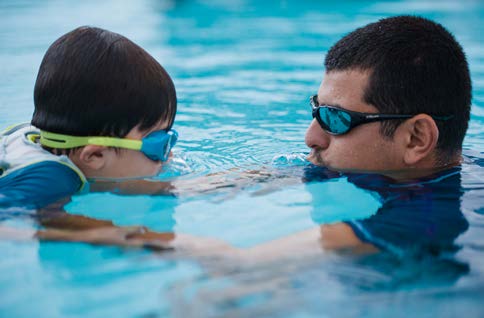
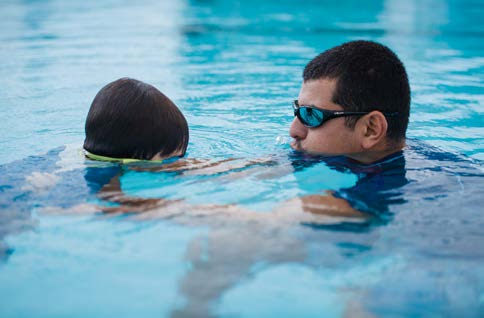
Basic swimming and self-rescue skills are taught in an environment that is within your comfort zone for water depth. The class size is designed to be easy going, the teacher will talk about the skill, demonstrate the skill, and take each student out to work on that skill (one-on-one). Each participant is encouraged to practice skills with each other to gain more experience in the water.
Adult 1 – Overview
3 min-Introductions. Make sure the adults know your name and vice versa.
3 min-Bobs
- DEMONSTRATE
- Holding onto the wall with both hands. They should put their entire head under water covering the top of their head, then pull themselves back up.
- Add a few bobs each day. They should be able to do more than 30 bobs by the end of the session.
5-10 min-Front Float
- DEMONSTRATE
- Make sure they have their arms out, legs straight, (like an airplane) and their faces in the water, if they are comfortable enough.
- If they want help hold under the armpits.
- Adults that can reach the pool bottom they may help themselves and help each other with floating.
5-10min-Back Float
- DEMONSTRATE
- Make sure they have their arms out, legs straight, chin and stomachs up, head back, toes pointed.
- If they want help hold them under their shoulders.
- You can have each adult partner up and help each other with back float, after your demonstration.
3-5 min-Kicking
- DEMONSTRATE
- Have the adults sit on the wall and do flutter kicks.
- Tell them to sit as close to the edge as possible and have them point their toes.
- Do not let them bend their legs at the knee!
- Make sure they move their entire leg including their thigh, in an upward and downward motion.
- Have the adults hold onto the wall and kick while in the water, then try having them hold their arms out straight and kick.
- REMEMBER TO CRITIQUE THEIR LEGS.
- Switch to the back
- Have them lay on their backs with head back and stomach up, hugging a kick board, practicing their kicks on their back.
- Ask them to bring their stomach up to the board instead of the board down to their stomach.
- Remember the entire leg needs to be moving.
5-10min-Front Crawl Arms/Kicks
- DEMONSTRATE
- You can have the adults perform their scoops on a kickboard or a barbell. Make sure their fingers are closed, with hands are cupped so no water will escape through their fingers. Have them pull the water towards them in a scooping motion.
- You can also use front crawl arms with kicks. Make sure they are at least blowing bubbles or putting their faces in at the same time.
5-10 min-Rhythmic Breathing
- DEMONSTRATE
- Start by having them hang onto the wall, putting their face in for 3 seconds then taking a breath to the side, alternating sides every time.
- Once they are comfortable with that have them hang onto the wall and do 3 scoops then a breath.
5-10 min-Backstroke
- DEMONSTRATE
- Have the adults stand in the water with space in between them. Tell them to stick their arms straight out in front of them and do one arm at a time. With fingers closed, thumb up, when it’s above your ear flip your hand and “wave hello” pinky all the way down.
- Repeat with the other arm.
- Push the water while hand is in.
- Using a kickboard, they can do arms and kicking with backstroke.
5-10 min-Elementary Backstroke
- DEMONSTRATE
- Also known as Monkey, Airplane, Soldier.
- Have the adult sit outside of the water on the wall and do the arms first. Hands in the armpits like a monkey transition to arms straight out like an airplane, then arms straight down to their sides like a soldier.
- Do the legs next. Feet together with knees bent like a monkey, then legs straight apart like an airplane and together like a soldier.
- Show the adults how to help each other with elementary backstroke by holding underneath their neck or shoulders and partnering them up to have them practicing more.
- Say out loud Monkey-Airplane-Soldier if needed.
5-10 min-Sidestroke
- DEMONSTRATE
- Legs: Scissor kicks, also known as “up-out-together”. Legs up and together tight like a cannonball, legs out like their kicking a soccer ball, and legs together like soldier.
- Arms: your lead arm is the one out in front directing where you are going, your other arm stays in water and will be pushing the water behind you so you move forward.
- ALL ON THEIR SIDE.
5-10 min-Breaststroke
- DEMONSTRATE
- Arms go in circular motion.
- Legs are “monkey, airplane, soldier” on their stomach.
- Breathe when arms are straight.
- One circle one breath.
2 min-Treading water.
- DEMONSTRATE
- When demonstrating just explain the different kicks they can use to keep their heads above water.
- Arms should go in a big wide circular motion.
- The slower students go and the more they relax the easier it is to perform.
Adult 2: Ages 15+
This swim lesson focuses on building fundamental swimming skills, including freestyle, backstroke, breaststroke, elementary backstroke, sidestroke, and basic treading water. Swimmers practice proper technique, rhythmic breathing, and body positioning through guided drills and demonstrations, gradually increasing endurance and confidence. The class emphasizes safety, comfort in the water, and readiness for more advanced strokes like butterfly if time and skill level allow.
Adult 2 – Overview
3 min-Introductions.
- Before starting class have a brief meeting about your expectations as a swim instructor.
- Go over everyone’s name and make sure they know your name too.
3min-Bobbing
- Have the adults perform 20 bobs. The goal is 35 by the end of class.
3-5min-kicking on stomach 25yards
- Let them use a kick board (if needed) with arms straight out, legs straight, fast flutter kicks.
- Put face in if possible.
3-5min-kicking on back 25yards
- Let them use board (if needed) with arms straight above their head, legs straight fast flutter kicks.
- Tell them to bring their stomach up to the board, instead of bringing the board down to stomach.
5-10min-Free Style with Rhythmic Breathing (50-100 yards)
- DEMONSTRATE (out of the water)
- You can have the adults do their free style arms on a kick board or a barbell. Make sure their fingers are closed so no water will escape through their fingers.
- Also use front crawl arms with kicks and rhythmic breathing
- Once they are comfortable with the stroke, take the kick board/barbell away.
5-10min-Backstroke (100yards)
- DEMONSTRATE (out of the water)
- Head back, stomach up, using kickboard first then take it away.
- Legs straight doing flutter kicks.
- Arms straight the entire time.
3-5min Breaststroke Arms (50 yards)
- DEMONSTRATE (out of the water)
- Arms go in a circular motion.
- “Monkey, airplane, soldier” legs on their stomach.
- Breathe when arms are straight out.
5-10min-Elementary Backstroke (50 yards)
- DEMONSTRATE (out of the water)
- Head back, stomach up.
- “Monkey, airplane, soldier” arms and legs.
3-5min-Sidestroke (50 yards)
- DEMONSTRATE (out of the water)
- Legs: Scissor kicks (up, out, together)
- Arms: Your lead arm is the one in front. That arm will direct where you are going. Your other arm will be pushing the water behind you so you move forward.
- Grabbing an apple from tree and putting it in the basket.
2min-Treading Water
- DEMONSTRATE
- When demonstrating just explain the different kicks they can use to keep their heads above water.
Butterfly (if time allows and/or if they want)
- DEMONSTRATE
- Dolphin kicks, legs together.
- Arms big in a circular motion that come out and above the water.
SAFETY
Safety Overview
- Sophie the Safety Seal "WATERSMART" Poster
- Safety must be emphasized beginning on the first day.
- The Sophie Safety Poster can be used as a fun visual aid to use with the participants to learn the rules.
- Each program coordinator may decide to add more safety rules that are site specific to your facility.
Sophie the Safety Seal WATERSMART Poster Rules
- Walking is fun, but never run
- Swim instructors should enforce that running around the pool can be dangerous since the area around the pool is typically wet and slippery.
- Running around the pool can lead to falling and getting injured or even falling into the pool.
- Adults have to say, a swim is okay
- Swim instructors should make sure that participants know they should never get into any body of water without permission from an adult. This can include not just pools but bathtubs or any other body of water.
- Two in the pool, is always cool
- Swim instructors should go over that participants should not swim alone. They need to have an adult's permission and supervision anytime they are in the pool or any other body of water.
- Easy rule - don't dive in the pool
- Swim instructors should go over the diving rule at the pool where the lessons are being held.
- Participants should always look for signs to see if diving is allowed where they are swimming. In some bodies of water like lakes and oceans it is unsafe to dive or even jump into the water when you cannot see what is below the surface.
- Raise your head above the water line, and you will be fine
- Swim instructors want to let participants know that when they are in swim lessons and waiting their turn on the wall they should always keep their heads above the water.
- Participants need to be able to see and hear instructions from their swim instructor and the Instructor needs to be able to see participants at all times.
- Swimmers hold on to the wall
- Swim instructors should have all participants hold on to the wall while they are in swim lessons waiting their turn.
- Move smart, if something falls in, call an adult or lifeguard but never jump in
- Swim instructors should let participants know that if someone or something falls in the pool they should not jump in after it.
- Participants should call for help from an adult or a lifeguard so they can either get the object or assist the person that needs help.
- Always obey what lifeguards and adults have to say
- Swim instructors should enforce the importance of always listening to the rules from lifeguards and adults when around the pool or any other body of water.
- Remember it's cool to wear your lifejacket in the water or pool
- Swim instructors should go over lifejackets. Allow the participants to wear lifejackets and get into the pool to explore with them on.
- Make sure the participants and parents know how to fit a lifejacket.
- Talk to participants about times that they should be wearing a lifejacket.
- Time to get out, if lightning's about
- Swim instructors should talk to the student about what they should do if there is bad weather while they are swimming.
- Participants should listen to adults or lifeguards if there is bad weather and they are told to get out of the pool area.
Lifejackets
- Proper fit of the lifejackets should be discussed with not only the participants but the parents.
- The lifejacket should be snug but comfortable.
- Make sure that all buckles and straps are fastened. There should be no unconnected buckles or loose straps.
- If the shoulders of the lifejacket are lifted up they should not go over the student's ears and chin.
- If the lifejacket rides up when the student gets in the water, it might need to be tightened or the sizing could be wrong.
- Along with going over the safety rules, instructors should also have all participants experience wearing lifejackets.
- Have participants get into the water with the lifejackets on and practice floating on their backs and moving around in the water.
- Have participants jump into the water with their lifejackets on to see how they float on the surface of the water.
- Participants should hold down the top of the lifejacket by their ears and jump in feet first, then swim to the ladder or edge of pool.
Additional Safety Items
- Teaching the participants how to enter and exit the water
- Student should enter the water feet first.
- Student should practice exiting the water on their own either by a ladder or the side of the pool.
DIVING
Poolside Diving
All diving progressions should be performed in water that is deep enough to prevent injuries from striking the bottom. Students will follow the steps below when learning to dive from the side of the pool. Each step is a progression from a seated position to a standing position. Practice each step until the student can move downward and forward at the same time.
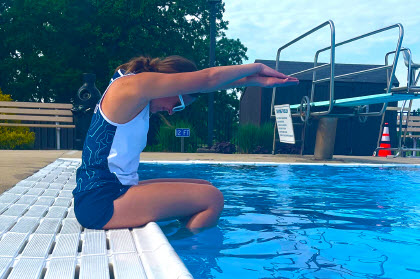
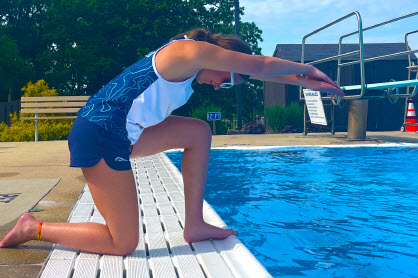
Step One – Seated
- Sit on the edge of the pool with your feet in the water, pressed against the wall ready to push off.
- Extend your arms above your head with hands placed on top of each other.
- Lower your chin to your chest.
- Lean forward with your arms stiff. As you reach out for the water use your feet to push off the wall.
Step Two – One Knee
- Stand at the edge of the pool. Place one foot forward so the toes can grip the pool edge. Kneel with the other leg.
- Extend your arms above your head with hands placed on top of each other.
- Lower your chin to your chest and lean forward with your arms stiff.
- Reach out for the water and begin to fall forward, push off the wall with your one foot gripping the edge.
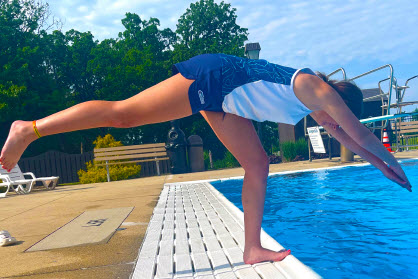
Step Three – Standing
- Stand at the edge of the pool with both feet so the toes can grip the pool edge.
- Extend your arms above your head with hands placed on top of each other.
- Lower your chin to your chest.
- Lean forward with your arms stiff. As you reach out for the water and begin to fall forward, push off the wall with both feet.
Springboard Diving
If your facility is equipped with a one-meter springboard (or similar height), beginning and more advanced concepts can be covered, as outlined next. Students must be comfortable in deep water and goggles are not recommended. Please follow facility and safety guidelines for diving board conduct. Springboard diving should be conducted by a certified/licensed vendor.
Beginner Springboard Diving
Students will follow the steps below when learning to dive from the diving board.
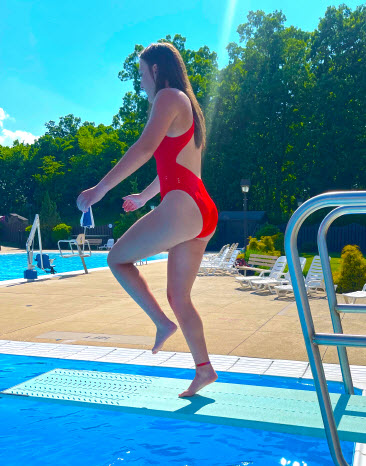
Step One – Standing on the edge of the board
- Stand with the toes gripping the edge of the board with arms above your head.
- Place your hands on top of each other and lower your chin to your chest.
Step Two – Bending
- Bending at your waist and knees, extend your upper body toward the water.
Step Three – Entry into the water
- Body, arms, and hands are pointed down towards the water.
- Both feet push off the board with a little bounce. While keeping your body streamlined downward while entering the water.
More Advanced Springboard Diving
Once a student has mastered the basics of entering the water from a springboard height, the student can learn the complete steps of springboard diving.
Step One – Approach and Hurdle
- Find your starting point on the board. Stand about 2 feet from the edge of the board and take five steps back toward the deck. You will begin your approach from this spot.
- Stand straight up with your arms loose at your sides and walk 5 steps forward.
- Step down hard on your 5th step and swing your arms forward, overhead. Bend the knee of your other leg. As you are bounced upward straighten both legs and glance down at the board
Step Two – Takeoff
- Land with both feet at the end of the board, bend your knees slightly, and then push off the board upward and forward. The springboard action will push you high into the air.
Step Three – Flight
- Keep your arms and legs together while in the air end at the waist to begin your headfirst path to the water.
Step Four – Entry
- Keep your body aligned with arms outstretched over the head while moving downward.
- With the body in a streamlined position, the hands enter the water first, followed by the rest of the body to “knife” through the water.